
Table of Contents
For all you Chromebook users, I know you and I’ve been waiting for this very moment for a long time now.
Google has finally released the ability to create multiple desktops for us. This blessing has been something many of us power users have been urging for years.
Windows and Macbooks have always been able to do this, why not us? Well, I’m here to tell you that you have been blessed by the Google gods with this feature. All the prayer and worship has finally been heard.
Being a productive device means that you have to be able to do multiple things or at least have an efficient way to present and organize multiple things on the same system.
I’ve created dozens of my own system of managing and organizing my work on my Chromebook for years. It was by way of getting around the missing multi-desktop factor. Since Google’s virtual desktop release, I’ve been using it religiously and I’ve got to say that I am really digging it.
So how do you simply move between virtual desktops using the touchpad? The answer lies in a 4 finger swipe either to the left or right depending on where the virtual desktop is arranged in your list.
Today, I want to talk about this awesome way you can navigate and move through your virtual desktop using just your touchpad.
What are virtual desktops?
Virtual desktops allow a computer user to create instances of multiple desktops so they can manage and organize different situations and projects. It helps to separate different projects or things that you are doing. Take for example, you can create a work desktop that’s only for work. This virtual instance of a desktop could be named something as simple as “work.”
In this work virtual desktop, you are only opening up windows and tabs that are strictly for work. No games, no youtube or leisure articles are allowed on this page. That’s something you enforce yourself.
Then you can create a second virtual desktop that’s only for fun and media consumption. That’s the desktop were you can watch YouTube videos, look up which celebrity did the most outrageous thing, or even look up instagram meme’s in. This desktop would have nothing to do with work and is purely for pleasure.
How do you activate virtual desktops?
Well there are 2 ways to do it.
One way to access the virtual desktop feature is to simply tap on the keyboard top key which looks like a square with 2 vertical lines to the right. This is sort of like the multi-tasking button. If you are on a non-Chromebook keyboard and using a generic keyboard, the button would be F5.
Another way to do it, and this is the way this article is focusing on, is the touchpad way. By using gestures, simply place 3 fingers on the touchpad and drag them all upwards.
What you’ll see here is the current browser you’re on ends up shrinking and floats into the middle of your screen along with any other programs that are currently open.
At the very top, you’ll see your desktop and to the right of that you’ll see the add new desktop button.

By clicking on this button, you’ll be provided with another desktop as you will see a brand new box show up at the top labeled as desk 2. You can repeat the button and it will add another desktop called desk 3 and so on.
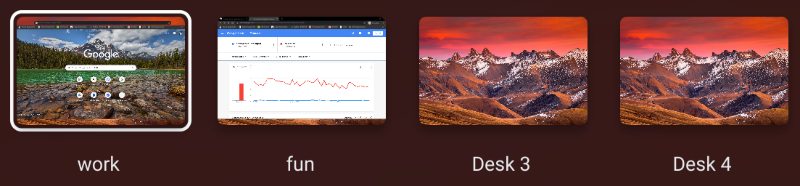
Currently, you are only able to create 4 desktops.
How do you simply navigate between desktops using just the touchpad?
This is the meat and potatoes of the article.
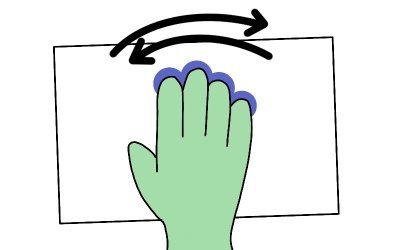
If you want to simply use the trackpad to quickly switch to another desktop, all you have to do is place 4 fingers on your touchpad and swipe in whatever direction relative to your current desktop.
You’ll see a transition of here you are leaving one desktop and moving to the desktop that’s located in the direction of your swipe.
There’s another way of doing it and that’s once again using the 3 finger swipe up method.
What’s the difference between 3 finger swipe up and 4 finger swipe sideways for the virtual desktop?
There are differences, advantages and disadvantages of both methods.
Let’s start with my observations of the 3 finger swipe up. The good thing about this is that you get to see all your created virtual desktops in an overview as well as the ability to choose which desktop you want.
With this method, you get to see the names of all your desktops and that can help save you time and confusion. You get to just pick the desktop you see.
When we go to the 4 finger sideways swipe, the main thing I can say about this is that it’s just fast. It’s basically like a shortcut. A simple swipe to the left for example will move you straight to the other desktop.
This can be a good or a bad thing. The bad thing is that you have to keep in mind which desktops are in what order.
I’ve had multiple times where I created all 4 desktops and ended up needing to move to another desktop, but not knowing how many swipes away it was. I eventually found it, but that whole process can get rather annoying.
It’s not fun and I don’t wish that confusion upon anyone.
Back to the speed though. Luckily, the 4 desktop limit makes trying to remember what desktop arrangement you came up with a little easier to keep track of. It’s pretty simple if you get the hang of understanding the way you structure and organize the virtual desktops. This is something you’ll eventually overcome like I did.