
Table of Contents
Today I want to talk about something that really frustrates a LOT of people no matter what industry you’re in. So, when you have a PDF file and you have to fill out the form, don’t bother with printing it out, filling the paper copy, take a picture of it, and scan it back in.
What’s the best approach to doing this on a Chromebook?
Kami is a free PDF annotation tool that allows you to fill out a pdf form right from your Chromebook. Kami offers lots of powerful features such as the paint tool, the media tool, and even the textbox tool. With these tools, you can annotate, draw, create signatures, and professionally respond to PDF forms.
I love using Kami because it really does provide a ton of options that help digitized all my paperwork and it even integrates REALLY well into my personal cloud storage.
Let’s talk about Kami for a minute.
What is Kami?
If you’re in need of a tool that will help you annotate and add things to a PDF file, Kami is your go-to. I’ve tried several different tools for Chromebook over the past years and I’ve always found myself going back to one tool, Kami.
Let’s say if you’re given a PDF file for school. And this PDF file has an outline that you need to follow in class, chances are your professor is going to add in some extra details through his/her lectures.
You have 2 options. You can print this PDF out ahead of time, bring your color ink, and start jotting down every important detail your professor’s going to say.
Or your second option is to use Kami. This simple, yet powerful tool allows you to take notes right on top of a PDF file. You can highlight, ink, type text, and more in a variety of colors of your choosing over the PDF form.
Kami is so powerful and best of all, free to use. Honestly, the free tool is really all you need if all you want to do is annotate.
How to download and install Kami?
- Navigate to the Chrome web store and search for Kami.
- Download and install it.
- Register by linking your Google account to Kami.
Benefits of using Kami over handwriting
When I was younger, I was pretty fast at handwriting. In fact, I could almost write down all the words my teachers would say in class. When I got older, I realized that this was never something to be proud of. I began to develop a strange pain in my fingers and wrist.
It happened just around the time when I was in high school, listening to a teacher and writing down what he said vigorously. That ache in my hand began to hurt bad. I don’t think it ever fully recovered.
I then realized that I needed to start typing my notes. So I ventured out to look for a tool, a software program that would help me write all over the handouts that my teachers gave me.
I started to teach myself how to type faster and I got much better at typing throughout the years. One thing I realized was that I had gotten really good at typing, and it didn’t seem to wear me out as much compared to writing.
And then, I found Kami. It was the tool I needed for class. It integrated with my Google account and all I needed to do was open a PDF file from my Google Drive and link it to Kami. A row of options and features would all show up on the side and I was ready to go.
I was typing in notes at such a fast pace. I was able to draw in notes and erase them at will. I never had to worry about messing up, eraser marks, or whiteout on a sheet of paper again. When I made the mistake, a simple Ctrl + z or undo did the trick.
When I write really fast, I even noticed that my words started to become illegible. I couldn’t read back what I wrote sometimes.
I also realized that all I needed was my laptop. I didn’t need a binder with several hundreds of PDF documents with tons of colored pens, markers, and pencils. I wasn’t carrying around packets of paper in my backpack.
It was all stored as data in which I could simply go in and edit at will.
Thanks to Kami, I was able to really organize my life and keep it minimal without having to spend any extra money at all really.
What makes Kami so good?
Simple
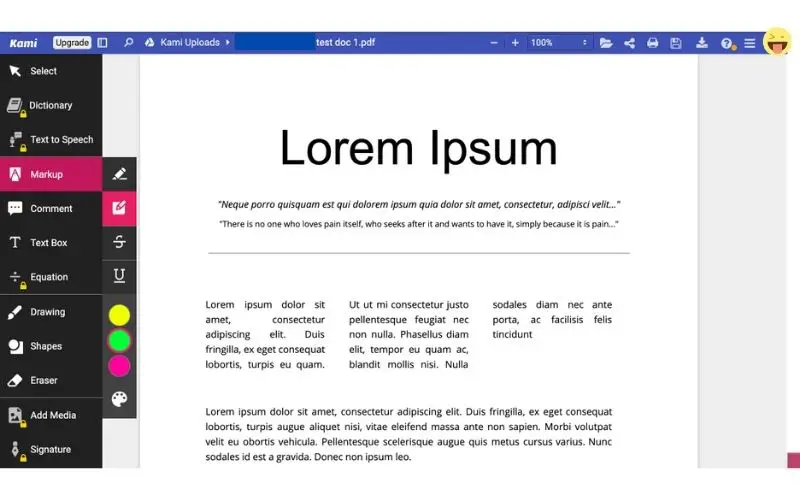
Good lord is Kami simple. The only way to start using Kami is by uploading the file into your Google Drive account. When you find the file, open it up, and you’ll be asked to open this file with a specific program. Select Kami and it will take you straight to the Kami UI.
While in Kami, you’re given super a super simple UI. If you highlight over any one of the buttons to the left, there’s going to be a short description name of the tool.
Everything that’s available to free accounts doesn’t have a lock on it.
You simply need to click on the action you need and start using it. If you want to create a textbox, all you have to do is activate it and click on any part of the document and start typing.
If you wanted to draw, click on the drawing tool and simply start writing.
Kami makes it incredibly easy to get straight into annotating the moment it turns on.
Not only does simplicity play a major role with Kami, but power does as well.
Powerful
Kami has a ton of features that are perfect for anyone who wants a solid performer in annotating. Kami works so well because the developers offer a few simple features and packed it with lots of customizations.
Your annotations have several dozens of colors you can pick from. You can comment, markup, and draw freestyle or shapes with Kami. It does pretty much everything you need when annotating.
Some of the most powerful features include the ability to save your work into your Google Drive account. This streamlines the entire process of saving it.
Not only can you open and save files from your Google Drive, you can also do the same from OneDrive, Box, and Dropbox as well. You can even pull your file from a local or shared file system too.
Kami even holds onto a history of your edits so if you need to backtrack into a previous time and a previous version of your file, you can simply do so.
If that wasn’t enough, you can also split and merge documents. You can run OCR which allows Kami to turn a scanned PDF into digital text, which can help with searching and sorting data on your PDF.
You even get some really handy layout views such as rotation, two-page view, presentation mode, and the ability to magnify into the document to make the words bigger.
Smart
Like I explained before, Kami allows you to go back several versions of the document so that if you messed up somewhere and didn’t realize it, you can simply go back and retrieve that file again.
Kami also autosave your work without you having to remember a thing.
If you’re a paid customer, Kami has this really need a set of premium features. One includes voice typing or using the voice-to-text tool. Simply activate this option, start a textbox, and just start talking.
In my tests with the tool, it’s not always correct, but it does save a lot of time and makes writing a whole lot easier. There are very few mistakes with Kami’s voice texting and I was rather impressed at just how fast it was able to translate my voice to words in the textbox.
Privacy
Kami is dedicated to privacy and has taken many major precautions to prevent things that could happen while using their service.
Just to help you ease your feelings with Kami about data privacy, there are actually many Schools in the US and all over the world that use Kami’s premium service. In fact, as of 2020, over 12 million people and students are currently using Kami.
Kami has a team of experts in the field who understand and have an extremely strong background knowledge on managing It processes on personal and private data.
They use Google Cloud Platform (GCP) and Amazon Web Services (AWS) data centers for cloud storage safeguards. These are the top-of-the-line cloud options not only for features and support but also because these centers give the highest levels of security currently available.
You have full control over your data, you can delete it whenever you choose. All data is also encrypted moving forwards and backward.
Finally, Kami is always monitoring its files and security. If in the rare occasion that they are breached, they will immediately notify you and give you confirmed steps they will be taking to safeguard your data.
What features exist in Kami and how do you use them?
Select tool
The select tool is sometimes known as the picker tool. You can select, and highlight, click or drag an object when using the select tool. This tool is simply for interacting with the objects or the file itself. It doesn’t usually add anything or remove anything from the form.
Dictionary tool
This is a paid feature that will allow you to get the definition of any word in your document. If you hover your mouse over the document, you can simply click on it and it will automatically show up with the meaning. The definitions are taken from the Oxford Dictionary and it only supports English.
Text to speech tool
This paid tool can help you edit and go back to see if something sounds right or not. There’s a lot of power built into this tool. To start, simply click on the tool, and either highlight a group of texts or just click on a single word and it will read the remaining document.
You’ll be able to pause the reading, go back, go forwards, and even loop the group of text to keep hearing it over and over again.
Markup tool
This tool is fully free and very powerful and customizable. You get options to a bunch of different colors including the ability to strike through the text and underline them as well. You can even control how thick the lines you make are.
Comment tool
The comment tool is basically free, however, some more advanced ways of commenting are locked behind a subscription.
As for the free version, you can simply click near the area of the document or PDF and simply start typing your message.
As a paid user, you have the ability to voice type that message, record a video from your device if it has a camera, and even save a screen recording on your device.
Textbox tool
The textbox tool is exactly what it is. It simply allows you to type in whatever it is you want anywhere on the document you please. You can change the color of the text as well as the font size.
Equation tool
Without going too deep into how the equation tool works, I’ve gone as far as using it to create symbols like the various math symbols you have when you write with paper and pencil. You also have symbols for chemical reactions with the directional arrow that can go both ways.
It’s like emojis created not for social media, but for academia. Some of the methods of input may even be automatic like if you were to make a fraction in equation mode, it would automatically know and then put your numerator over your denominator.
There are even shortcut keys.
The possibilities with education are pretty impressive with this tool.
Drawing tool
The drawing tool is really fast and responsive. You won’t see any lag or latency in the pen input.
Unfortunately, you’ll need a Chromebook that is pen-enabled. Such devices like the Pixel Slate, Pixelbook, Samsung Galaxy Chromebook, etc are just a few that come to mind.
Again, you can really customize what you write with different colors, different shades, different stroke thickness, and different transparency levels.
Shapes tool
Shapes tool is really handy for when you want to create straight lines, 4 sided boxes, perfect or stretched circles and triangles of all shapes.
You can even color the lines, change its thickness and transparency.
Eraser tool
The eraser tool has 2 different options.
One is to erase only drawing and shapes which it focuses on. Let’s say you have a combination of shapes and texts. While the drawing and shapes eraser is activated, you will only be able to erase the drawings and shapes. The textboxes will be left untouched.
The other option is to use the all annotation eraser tool in which will erase practically anything you’ve added on Kami other than the PDF file itself.
Add media tool
As a paid member, you can upload videos and pictures from your computer, google drive or even youtube. Simply select the video and drag it on the document. You can even change the size of the video so that it will fit nicely on your document.
Signature tool
With the signature tool, it simply allows you to create a signature by opening up a new canvas so you can create a signature. You can then save the same signature and use it multiple times on your document. This makes it work like a stamp.
It’s locked behind a paywall.
You can also upload pictures onto your “stamp” and use it as a signature.
The bottom line
There are so many things you can do with Kami.
If you’re a student who’s on a budget, this might be the very thing you need to take your notes on. Using Kami does away with all the extra paperwork and the stress of organizing and bringing along heavy loads of paper in your backpack.
You can even use this tool for work if your job requires a lot of note-taking and collaboration. With everything from the simplicity of the UI, to the powerful features, to the state-of-the-art security, Kami is set out to be an extremely safe choice for people who need a document annotation tool.
I highly recommend that you check out Kami. It’s got all the potential to make your life a whole lot easier.
FAQs
Can Kami be used on Google Docs?
Not directly, but what you can do is open up your Kami tool > Open file > open a Google Doc. Kami will automatically convert this Google Doc into a PDF and you’ll be able to annotate the document.
Can Kami convert PDF files back to Google Docs?
The answer is no. However, there is an alternative. If you saved the annotated Kami PDF file to your Google Drive, you can open it up with Google Docs. Unfortunately, this method doesn’t register your Kami annotation. Also, the original document’s words and texts all seem to move around as if there are annotated ghosting.
Can Kami be used on an iPad?
There isn’t a particular app specifically designed for iPad. Fortunately, Kami is considered a web app and that means it will run well as a browser. Just go to web.kamiapp.com and sign in with your Google account.
What browsers will Kami work on?
Kami works on Google’s Chrome, Mozilla’s Firefox, Microsoft’s Edge, and Apple’s Safari.
Can Kami be used offline?
Yes, the Kami extension will continue working even if it doesn’t have an internet connection. However, you will be notified if Kami is not connected to the internet. You can continue working and when Kami connects, all your annotations and work will be updated.
You also have the option to save your work locally on your computer’s hard drive. But be warned, if you close your annotated document without an internet connection or locally saving the work on your local storage, you run the risk of losing all your work.
Where are Kami files stored?
By default, your Kami files will be stored in Google Drive. Even your history of annotations will be recorded and be available to you to access. Kami automatically saves your progress every minute while your document is open and annotated.
How do I restore my Kami annotations?
If you made a few mistakes along the way, you can restore all your annotations based on a page-to-page basis. Simply find the restore annotations link on the menu and select the version you want to restore which will be based on time and date.
Other interesting articles:
