Table of Contents
One of the worst kinds of emails is those that have tons of information and data typed into the text that sort of confuses the receiver. It’s oftentimes pretty overwhelming to read lines upon lines of text with tons of facts and data in it.
Have you ever been in this situation? Maybe it was an email from the school about a particular assignment or perhaps an email sent out from your employer with tons of information in it. Reading paragraph after paragraph to try and get the gist of things can also become pretty time-consuming. Emails are fundamentally messages and these messages need to be as clear and easy to read as possible.
Sometimes, it is how we format the information that makes it easy to understand and readable to the receiver.
This article is going to help go over creating tables for your email and how you can directly place the table into an email box. But you’re probably asking, why would I ever need a table and how would that benefit me? A table is a format that breaks down data into easy to read pieces. It removes all the fluff and gives you pure unadulterated useful data in an organized fashion. Tables are often welcomed because it’s engaging. We can most likely agree that a table is eye-catching. It’s also incredibly easy to follow and read because it breaks down all the actual data. Tables sort out and organize the most important parts of data and what the creator is trying to get across.
It’s a nice release from paragraph after paragraph of text. It can turn a confusing article of numbers and scores into a nice and neat display of easy-to-read data.
Can you put tables and graphs into a Gmail email? Yes, you can. Google has incorporated Gmail and allows the sender to simply attach media to their emails and this also includes graphs and charts taken from spreadsheets like Google Sheets. The media content, in this case, an image of a table, shows up fully within the Gmail message without having to click on an extra button or opening up a file to get there.
In this article, I want to show you how to add any table from Google Sheets to your Gmail messages.
How to Create and Insert a Table into a Gmail Message
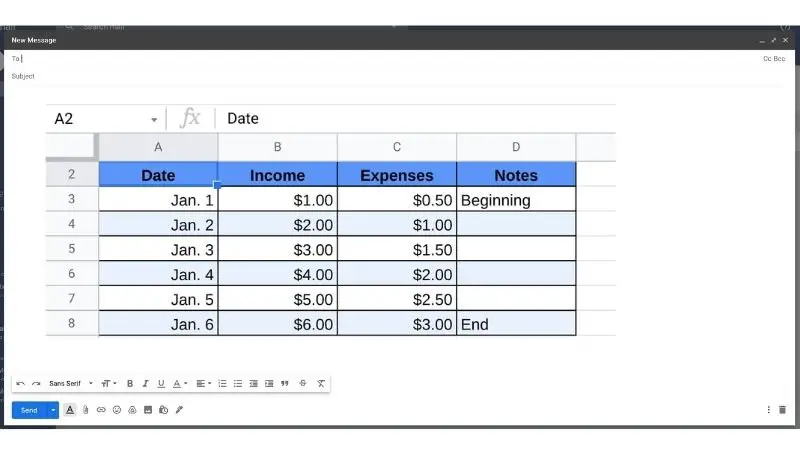
- Create your table using Google Sheets.
- Highlight the entire table.
- Right-click on the table with your mouse or two-finger click on your trackpad.
- Click Copy.
- Open Gmail
- Create a new message.
- right-click the message textbox with your mouse or two-finger click on the trackpad.
- Click Paste.
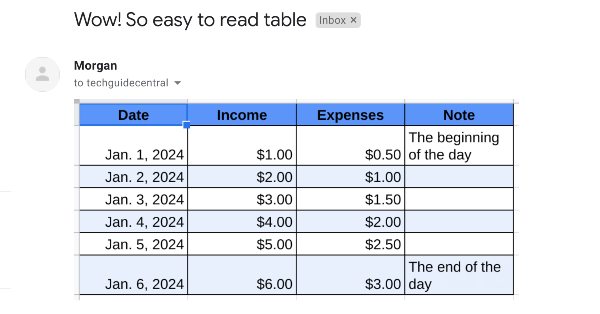
You should now see the table of data from Google Sheets on your Gmail message in its entirety. Once you’ve sent it to the person you wish to send it to, that person shouldn’t have to do anything special to open up and view this table. The table should automatically show up as they click on and open the email.
They are definitely going to thank you for this.
Sending the table as an attachment through Gmail
This is the alternative to sending your table to the receiver through Gmail. The steps I’ve shown you above are to simply copy and paste the table onto the textbox of the email. This is a different method that involves you actually attaching the table and embedding that attachment into your email message.
What makes this attaching the table so much different from pasting the table into the textbox? By attaching the table, you are creating a file, separate from the text-based message of the email itself and sending it too along with the text defined message.
You can think of something like sending a sealed envelope within another sealed envelope. In this case, if you sent an envelope within another envelope, the receiver would have to first open the first envelope to read the message. Then finding the second envelope inside, the receiver would have to open that envelope up as well to view the table.
Attaching a file is almost no different.
What’s the benefit of sending the table as an attachment? As the sender, you have one of 2 choices when sending the table. You can send an actual multimedia image of the table. What I mean is, sending simply a picture of the table. Or you can send an entire file of the table that can only be opened using Google Sheets.
What are the benefits of a full saved file with a table in it? The receiver will now be able to save the table directly into their computer and use it for other things instead of having to go back into the email. The saved file can also be altered and modified if you’re working with that particular person on a project that involves the use of actively working on that table.
How to send a file as an attachment through Gmail
- Open up Gmail.
- Click on the Compose button to start a new message (or reply to a message).
- At the bottom of your message, click on the paperclip icon.
- Select the file you wish to attach.
- Click Open.
You’re all set and done now. After pressing the open button, you’ll notice a progress bar appear at the bottom of the screen telling you that the file is currently being uploaded. Once the progress bar is fully colored, you’re good to go.
When the receiver gets this, in order to view the contents of the attachment, they will have to click on the file and open it up in whatever program that file can open up in. The receiver will also be able to download it if necessary.
I noticed there’s a lot of people asking about the issues they are having when copy-and-pasting a table from Microsoft’s Excel to a Gmail message. I have a solution for you.
How to Add a Table from Microsoft Excel into a Gmail Message
- Open Chrome and go to sheets.google.com.
- Create a new spreadsheet.
- Click on File.
- Then Open.
- Look for the Excel spreadsheet file and click on it.
- Go back to File.
- Click on Save as Google Sheet.
- Highlight and copy the table and paste it into your Gmail message.
The process of getting a table from Google Sheets to your Gmail is easy. But what if you don’t work with Google Sheets? What if you only work with Microsoft Excel, which is another very popular, well-known spreadsheet program? Well here’s a solution for you. This isn’t quite as elegant of a solution, but it does work.
After this, Google should take care of the rest for you. Google Sheets will automatically convert this into Google’s own format. My guess is that this conversion will be easy for Gmail to read and simply following the steps from above afterward should do the trick.
When people are copy-and-pasting a table from Excel directly to a Gmail message, the data gets skewed everywhere. This is because Gmail doesn’t recognize Excel format. It’s just not directly compatible and would only distort the data.
That’s basically it. A simple workaround is by first converting the Excel spreadsheet into a Google spreadsheet. This is currently the only alternative I could find to solve this problem.
What’s the difference between receiving an attachment vs getting it pasted on the textbox of an email?
Sending someone a pasted image into their email messages is more limited. It’s almost purely for reading and viewing. When you copy something and paste it into the message of your email, it comes to the receiver as view-only.
Sure you can select, copy, and paste that text into your own file, this isn’t as optimal as it could be.
When sending an attachment, there’s a lot more you can do here. Sending an attachment is actually sending the entire file itself. This file may or may not be read-only. It may also be writable as well. What I mean by this is that an attachment also allows you to edit and modify because, in order to open this file, you would have to open it up using another program. Take a Google Sheets file that was sent as an attachment to you. Once you’ve opened the attachment file, you would end up in the Google Sheets program and ready to change or make modifications to the file.
You should stylize your table in Google Sheets
One thing I’d recommend before sending the file by either attachment or pasted into the message is styling. It’s not mandatory but I find it helps the readability of the data. It’s important and since we are trying to make it easier to digest information using tables, I thought this would be a good topic to talk about.
Now, Stylizing your table is also very important, but not always necessary. It makes things easier to see and it basically improves the readability of the information. I think it would be a great idea to bold, add color and make interesting fonts. This would allow the reader to immediately see the headers and rows making it pretty to the eyes.
If you want some quick tips on stylizing your table for readability, I’ve compiled a few tips below. Please continue reading or you can check out this article on how to stylize your Google Sheets and make it look professional.
Add borderlines to your table in Google Sheets
Gmail has a defaulted white background when comparing to the grid layout of Google Sheets. The borders don’t come standard when draging a table from Google Sheets to your Gmail textbox. If you were to lay a white table without any borders, onto a white background like Gmail, you’d get a bunch of what seems to be floating data aligned with subheadings and rows. This can be a bit confusing. It would be difficult to read the table if you were to simply just copy and paste it without doing a little bit of stylizing.
I recommend taking a few minutes to simply create alternative colors for every other row (but more on that later) and perhaps create and define the border lines so that your table shows up apart from the Gmail message you may want to write along side the email.
Color the cell background in Google Sheets
Highlight the top row and change the cell’s color by clicking on the Fill color icon above in the tabs. Select a color that’s eye-catching. If you wish to have 2 different tones of color, just make sure they complement. Google has some really good default templates already there and the complements of colors are already great for many different themes. Again, more on this in detail can be found on another page here (how to stylize your Google Sheets and make it look professional).
Then highlight the first column of labels and do the same. The color of the top row and the left-most column doesn’t have to match. They just have to pop out at the reader.
Bold the top row and left column in Google Sheets
It’s also nice if you bold the top row and left column as well. It adds on a separation effect from the data found under it.
Highlight the top row and go to the top icon that looks like a darkened B which is labeled Bold.
Now do it again for the left-sided column labels. These are the cells you want to pop out at the reader. It’s not the information itself but it would be what’s considered the director of where a reader’s eyes should focus on the moment that reader opens the file.
Create borders in Google Sheets
Since the background of Gmail is white, this might be the most important tip.
Start with highlighting the entire table. Then, look for the tab above called Borders. The border will have several different options, but I recommend you select the one that has all lines visible.
You’ve done it! What a beautiful table you’ve created and the reader will surely appreciate it as well.
