
Table of Contents
As an Amazon Associate, we may earn a small commission from qualifying purchases if you click to Amazon from our site and choose to make a purchase.
Are you looking for a way to make custom t-shirts with your company logo or design? If so, then sublimation inks are the answer.
Sublimation ink is water-based and works on just about any fabric material. You don’t need a specialty printer like an industrial heat press machine; instead, use your regular office laserjet printer!
This technique has been around for several years, and a common notion is that it costs a lot to make custom prints on a t-shirt, even if you do it yourself from home. Well, I’m here to tell you that sublimation is both extremely cost-effective and dead simple to do.
There are very few investments to make when it comes to the sublimation ink technique.
In this article, I’ll show you how to print custom t-shirts using sublimation ink from your home or office printer. I’ll even show you how to design your art for free.
The process won’t even take more than 10 minutes to fully print an image on an entire shirt. So what are you waiting for?
Let’s get started right away.
What is sublimation ink?
Sublimation ink is a specialized water-based ink that can be used for producing printed images. These are then transferred onto products using a heat press process, which is also known as sublimation printing or dye transfer printmaking (DTPM).
When heated to the correct temperature and pressure level, the ink ends up transferring itself from a placeholder, namely called sublimation paper, to the desired product.
The process won’t even take more than ten minutes, and it can be done on your home or office printer! So what are you waiting for? Let’s get started right away with this guide that will show how easy sublimation printing is when using a regular inkjet color laserjet type of machine.
Surprise! Printing by sublimation is stupid simple
In this article, I’m going to show you how to print logos and design family t-shirts within minutes. This process is so simple that you can do it at home or in your office.
The process of sublimation printing is a chemical reaction that occurs when the ink (sublimate) changes from solid to gas without reverting back into liquid form, and this happens by applying heat with pressure on top for about ten minutes!
And it’s way cheaper and much less complicated than the traditional screen printing process.
The sublimation ink is water-based and it’s not toxic, so you can use this at home without any worries!
Things you will need for sublimation printing
| Image | Product | Features | Price |
|---|---|---|---|
The Perfect Printer! 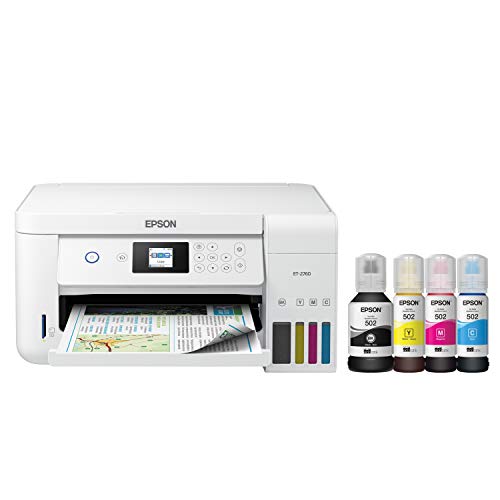 | Epson EcoTank ET-2760 Wireless Color All-in-One Printer |
| Check Price |
The Perfect Ink! 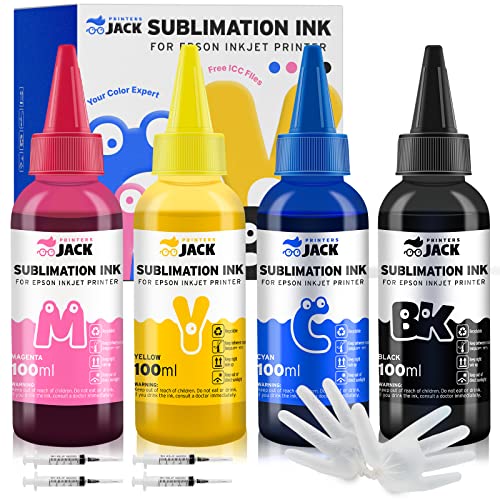 | Printers Jack 400ML Sublimation Ink |
| Check Price |
The Perfect Press!  | Cricut EasyPress 2 Heat Press Machine |
| Check Price |
The Perfect Tape! 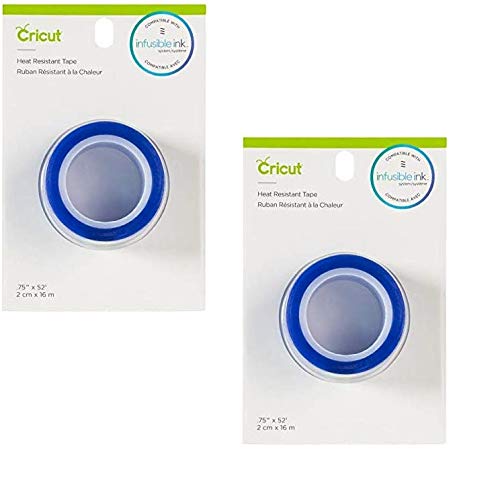 | Cricut Heat Resistant Tape |
| Check Price |
The Perfect Paper! 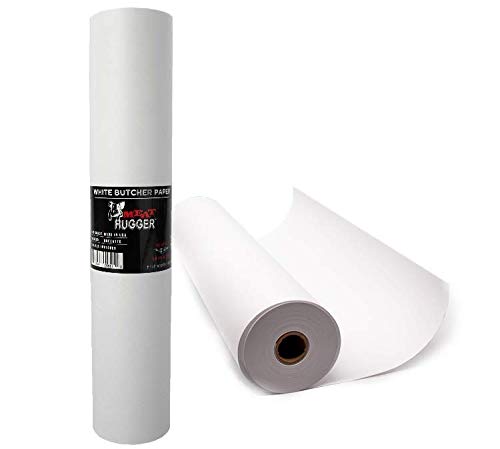 | White Butcher Kraft Paper Refill Roll |
| Check Price |
A simple inkjet printer
The reason why I recommend the Epson EcoTank ET-2760 is that it’s a neat little printer that doesn’t use ink cartridges. Instead, it uses a water-based pigment inks system which is much more cost-effective and environmentally friendlier than your regular cartridge printers.

This device is an absolute must! It will save you so much money in the long run.
Instead of replacing cartridges, this printer allows you to add your own ink to continue using it! You’ll rarely find a brand or printer that allows you to do this anymore.
You’ll save a TON of money buying your own ink and refilling it yourself.
Sublimation ink
This is the magical ink that actually makes all this happen.
It’s a water-based ink that is designed to be used with heat presses.
The best thing about sublimation inks? They transfer well from paper to other fabrics by simply applying heat.
This ink goes great with the Epson EcoTank ET-2760. Sublimation ink comes in different color bottles in which you pour it into a cartridge. Like I said before, this is a perfect match for the Epson EcoTank above.
Easypress
This is a big slab with a flat bottom surface that gets really hot, really fast. Think of it as a large, sophisticated iron. The Easypress is used to transfer the sublimation ink onto fabric.
The Easypress is a great investment because it’s so versatile and isn’t attached to anything. You won’t be limited by the range of movement when holding onto this thing.
Just place it on top of the fabric and press.
Heat resistant tape
The heat-resistant tape helps keep the fabric in place so that it doesn’t move around while the Easypress is working its magic.
It’s a good idea to use this tape when using sublimation. If you accidentally move the paper with the printed ink, you’ll most likely get a blurry image.
The tape is also great for when you’re printing on a T-shirt because it will keep the fabric from stretching and pulling
Butcher paper
Butcher paper will help with controlling where the sublimation ink is transferred to.
This is an important part of getting the pressing process done correctly. Without this paper, you might end up with sublimation ink bleeding through to the other side. Or even worse staining the press itself.
Regular printing paper
Regular printing paper is really all that’s needed. There have been multiple tests to see whether buying sublimation paper actually makes a difference. The results? Not really.
T-shirts
If you’re looking for t-shirts, the best kinds to use are lighter colors. It doesn’t have to be white. However, most people do recommend that you look forward to t-shirts that are made of a majority of polyester.
Now, it’s very important to use a fabric that is more polyester than any other material like cotton. The reason being is that sublimation ink actually bonds more permanently to the polymers in polyester.
This means that if you use sublimation ink on polyester, washing the shirt won’t fade the image as much as if you would have used cotton.
Computer with internet
You just need a computer with an internet connection. You also be using Canva which is a free web tool that allows you to create, drag, and produce pictures on a canvas size of your choice.
How to print on T-shirts using the sublimation technique
- Turn off your Epson printer.
- Open up the ink cartridge chamber, and instead of filling it up with regular ink inside the printer, fill it up with sublimation ink.
- One thing you’ll notice is that it’s hard to pour ink into the printer unless you are using the Epson-branded tool that is actually a part of the cap on the company-branded refill ink. This isn’t required, but you can remove that cap from the Epson container, plug it into the designated ink chamber of the printer, and funnel the sublimation ink through the opening end. If you don’t have an Epson cap, just be patient and pour your sublimation ink in slowly.
- Fill all the colors up until they are all full. You can tell if it’s full because these types of printers will have slots where you can see the gauge of the ink.
- Power on the printer, and wait for it to initialize and run a few checks and tests.
- Confirm all the required alignment and color tests as asked by the machine.
- Find or download your image online. You can find any image you like, even if it has color. Make sure these are high-quality images because the low-quality or blurry images that you resize might end up reflected in the results.
- Register and sign in to Canva.com, which is an online website application that helps you edit photos and images on a canvas.
- Change the canvas size to 8.5 x 11 inches because this is the size your printer is used for.
- For best practices, make sure the image doesn’t get too close to the outer edges of the canvas. This might now show up in print.
- This is IMPORTANT. If you have words or letters in your graphic, you’ll need to flip the image horizontally. When it gets pressed onto the t-shirt, it won’t look backward. If there are no words, you might not have to worry about it.
- Once it looks perfect, print this out on your Epson printer that now prints in sublimation ink. You can use regular printing paper. For best results, set your printer to its best and highest quality settings.
- Double-check the printed sheet to make sure there aren’t any blemishes or lines because this may show up on the t-shirt.
- Place your t-shirt on an ironing board by slipping the board of the ironing board through the bottom hole of the shirt, you only want to work with a single layer of the shirt because this process may bleed the ink through to the other side. And if you want, place a sheet of butcher paper between the table and the layer of shirt you are inking to. Make sure the shirt is clean and lint-free.
- Place the print, face down, with the picture upright and aligned to the shirt until you are pleased with how it should look.
- Remember to put some heat-resistant tape over the face-down print so it won’t move or shuffle while you press. This is optional but if you are a perfectionist, you won’t want to skip this step.
- Place a sheet of butcher paper directly on top of the print. This butcher paper will help prevent any ink seepage from the paper to the Easypress.
- Set the easy press to 400 degrees F and 60 seconds and wait for it to let you know when it’s hot and ready.
- Press your Easypress over the image for 60 seconds while laying on a small amount of pressure with your hands.
- Once the 60 seconds are up, peel off the paper and you will have a beautifully printed graphic on our new t-shirt.
My final thoughts
Printing on t-shirts is a wonderful way to customize your wardrobe and make it unique. It’s also a great way to show off the artwork you love or commemorate an event in style!
If this is something that interests you, I recommend checking out the table we created. These are the essentials I’ve mentioned in all my steps.
This is all you need to get started on creating an entire collection of awesome outfits!
Other interesting articles:
